Any project that lets me use this tool is a little scary without help. I figured it out but I am really surprised I didn't kill anyone.

 |
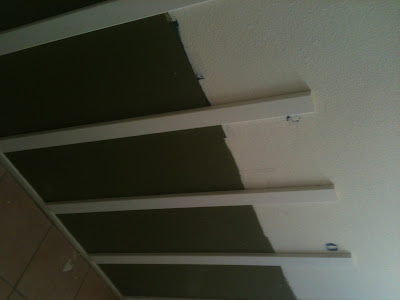
| angled edge so I could use the baseboard I already have. |
For the boys bathroom I decided I wanted board and batten. It's a fun and pretty inexpensive project that will add a ton of impact. I started with 10 4 foot pieces of 3 inch MDF. I had it on hand but my guess is that the cost would be about $50 for the whole project. I didn't want to replace the baseboard so I worked around it by cutting an angle at the base of each piece of wood. I spaced the boards 12 inches apart and applied a bead of liquid nail to the back of the board. I used a level to make sure the board was straight and used the brad gun to secure the wood to the wall. You can see in the above picture the wall once this part was done. The next step was adding the top molding. I measured and cut the wood and applied it the same way. Here is a great site with a few links to tutorial on adding board and batten
http://hookedonhouses.net/2010/09/15/how-to-hang-board-and-batten/ |
| Once the wood was on the wall I let it dry overnight to make sure it was all secure. |
 |
| I didn't want a silver mirror so I blue taped it, used the bulls eye primed and painted that bad boy white. |
 I ran a bead of paintable caulk along the side of each board before I painted it so there would be no gaps. I let that dry and did a coat of paint to the entire room. I added a primer first so the deep olive green wouldn't show through.
 While I was waiting for the paint to dry I spray painted all of the light fixtures and switch plate covers with a spray paint called Rustolium metallic. I got the Oil rubber bronze but they have other colors. I used this on the shower curtain rod too. This stuff is awesome.
 |
| Mirror framed out using liquid nails and taped for 24 hours to secure. Since you can't nail into a mirror the liquid nail works wonders. There is a how to on the mirror frame in our master bath redo. |
Last little detail was the faucet handle. I loved the idea from the blog link I have you but mine was done using a printer, scissors and that's it. Easy and free.

No comments:
Post a Comment