Saturday, March 31, 2012

My room and a fun little project I just had to do

I saw the cutest diy mugs in a kitchen reveal over at http://www.the36thavenue.com/2012/03/our-white-kitchen-reveal.html the tutorial is here http://www.the36thavenue.com/2012/02/number-stenciled-mugs.html Aren't they cute hanging in the kitchen? I fell in love. Also, isn't her kitchen amazing. The things that can be done with a little paint. Even her counters are painted Formica. If you have a chance to look around her blog there are some cute projects. Anyways, the store only had two mugs but I plan to buy 3 more (5 total for all 5 of us) when they get more and are on sale. I put some hooks into the bottom of the cabinet and love the way it looks. The paper towel holder is moving or leaving when I get more mugs. Love!!! Plus they hold like a gallon of coffee, double love. 


I did a few more little things to my bedroom to brighten it up and show it some love. I re framed our wedding picture since it was in a frame with broken glass. I used a paint market to write "grow old with me,,,the best is yet to come"
I added a little shelf to the wall with pics of the boys and a few special trinkets I love. My Mom bought the quilt angel for me like 25 years ago and she has been somewhere in my bedroom ever since. I also added a little angel picture on the shelf that used to be in my grandmothers home before she passed. It's the little things that make me smile. 
I painted the matt's on the pictures so they would stand out more. 
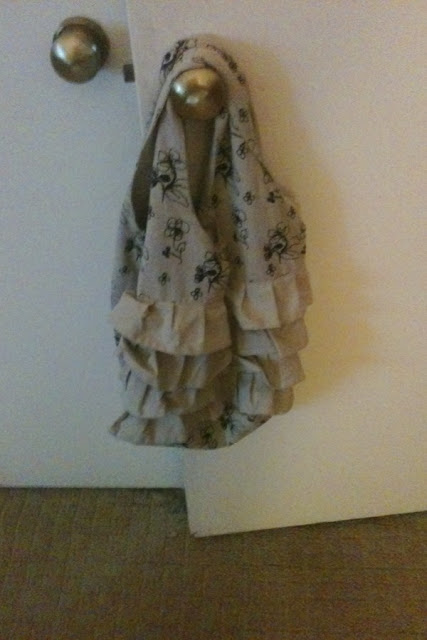
I added this cute little fabric bag to the back of the door as a dry cleaning bag. I can grab the bag and take it with me. 
I love the natural light but man it makes it hard to take pictures. 
We added this cute little bench. I have plans to paint it and we are waiting to see it is will stay. I put it down and promptly kicked it 1 minute later since I wasn't used to it there. 
Last little project I did was wrap 2 books in paper and add them to the stair table. It needed something and books seemed cute and free. So these were my Friday projects. 

Friday, March 30, 2012

Window treatments

New window treatments! This was not a planned event but yesterday I decided to take down the burgundy blackout curtains in our room to wash them. Once they were down I decided they were not going back up. They just look drab and there. I have never loved them but we got the whole thing done for cheap and it worked at the time. 
I took some old twin flat sheets in white out of the linen closet. We never used them and they were clean and there. I folded them in half and draped them over the bar. The edges are already finished so no sewing, bonus!
I took some white ribbon (2 yards each bow) and wrapped it over the bar, bunched the fabric and ties a pretty bow. like this
Did the bows here and there until I liked the spacing and done! Super easy and I love them. 
Look at all the natural light that stream in my room. So bright and cheery. 

Even at dusk the room is bright and airy. 
Wanna know the best part? Here are the curtains I loved from Pottery barn but at $59 each there was no way I could afford 5 of them. 
I am still going to sew a rod pocket at the top like in the Pottery barn version but for now they are up and we like them. Now bad, right?

Wednesday, March 28, 2012

Love my boys

As my kids are getting a little older I am starting to think about things like when they move out..... If you open my recipe cabinet it looks like this. Pretty, I know. I know the what's what to this mess but if someone else wanted to cook one of my recipes they wouldn't be able to. I do a dash of this or an eyeball amount of that. I decided that when my kids move out I wanted to be able to send a recipe book with them. My mom did this for me and my siblings and I love it. I decided to jump a little ahead of myself and start putting my folder together now. Garrett is almost 15 so I have 3 years (ya, right) to get it all together. here are my rules. 1. We must love the recipe. @. We had to have eaten it a few times. 3. it must be one the kids like and would want to take with them. I started by pulling out all my recipes and getting them in order. 
I found this super cute recipe book online for $10. It's sturdy and did I mention CUTE! Its a binder so it will be easy to add to and adjust as needed. Each section is labels and has a little pocket to tuck things into. 

It came with these cute pages to write your recipes on. It had 15 so I took them to the local copy store and had them color copy the pages for me so I have plenty of cute pages to add to the book. 
I got a nice marker and started adding to my book. It will take a bit to get all the recipes written but once I do all I have to do is photocopy the pages and make new binders for whoever wants them. Just another way to organize my life. 

Tuesday, March 27, 2012

Mini table redo

I was shopping at Michael's back in early February and saw this sad little table. I put it in the cart and took it back out because even though it was a great deal at $9.99 I had no real place for it. We have been doing a little work on our stair landing and one of the things on our wish list was a little table that would fit without being very large. I thought of the tiny table but thought there was no way it would still be there. Well, it was but it was in rough shape. For $5 I figured if it was beyond repair I was only out $5. Here is the before. 
A few new screws since the old ones were stripped out and one coat of white paint, already better. I decided to distress the little guy a little to give it that farmhouse look that I love. 
I painted a small section with a tiny brush. While it was still wet I used my wet finger to rub the paint around and give it a worn look like above. It took all of 10 minutes to do the whole table. If I didn't like it I could always paint back over it again. It turned out cute! Threw a little pitcher and some flowers I had in the garage, done. I also added the framed pictures above it. I got the prints on ebay for $4 for 3. Add cheap Michael's frames and a painted matt on the edge and I have a cute little landing on my stairs. Keep in mind we are still saving to redo the stairs so their will be hard wood and baseboards in the area really soon. Isn't it cute?

Monday, March 26, 2012

Clubhouse for the boys

Do you have a boring old closet under your stairs? We do or should I say did.....
Give me a hammer and you never know what I will do. I found old fast food bags, cigarette butts, builders packaging, and just gross dust. It must have rained while they were building our house because the floor had a layer of old mud. It took about 2 hours just to clean, vacuum, mop and add paneling to cover the exposed wires and outlet boxes but the kids are already loving the result. We have more plans for it but all the stuff we did today was free!

All of the white walls are the paneling I had to add to cover the wires. The kids added a toy box, some favorite stuffed animals and blankets and pillows for now. They think it will be the best place ever to play their video games.
Still some work to do like I said but this is the closet now. Pj picked the fabric out of my old stash and put of the letters. I was hoping to make the door a little taller but we had to add a 2x4 and the clubhouse sign to cover an electrical wire. It is 100% safe and there isn't even a nail you can catch on.
A little curtain that they can open and close
The door has a panel they can open or close too.
They have been hanging out in it (all three of them) for a better part of this afternoon. If they get tired of it we can use it for seasonal storage so no harm no foul. 

Sunday, March 25, 2012

My work area

Back in January I redid my work area. You can see the pics and details here http://housetohome2012.blogspot.com/2012/01/my-desk-area.html As much as I loved the crib on the wall and some of the "cute" details they just didn't work with a home business that needs to have really good organization and function. 
I needed to take some time to get my office/studio organized in a way that would be long tern instead of another quick fix and another post on the block about my work area in a few months. My husband and I came up with some ideas that we thought would work and got to it. 
I started yesterday morning sorting through all of the books of paper that I had and coming up with ways to organize the items I use all the time and make them easier to get to. I also wanted a way to store block set themes in a way that all the stuff I need to make a set of blocks is in one area instead of digging through all the paper boxes each time I need something. 
I sorted through all my paper (4 hours of sorting) and got my plan together. I decided to put each theme in a ziplock. I went to Lowes and spent $9 and got a big piece of pegboard. Add some hooks and the themes that I use all the time and easy to get to. 
My husband built me a little shelf for the back of my work area that we added baby food jars full of buttons to and not my buttons are right there when I need them. Cute clothes pins hot glued on the pegboard and shelf and we were in business. I think it took 8 hours to get it all built, painted organized and pretty but so worth it when I am able to find everything I need. Plus I purged all the old papers and paints, etc that I can't use or hated.
I am excited to see if the ziplocks hold up and work the way I am hoping. The shelf and pegboard makes tons more work space for me since things are up off the table. My office feels more permanent vs. feeling like some folding tables in our formal living room. 
After
The shelf my hubby built. 
organized solid papers
buttons all organized
Organized computer area and pegboard
pattern papers all organized by color, printer and order info on a shelf and all my supplies  organized again. 
Each theme block set is in it's own bag hung on the pegboard, ready to be used! Why are the words upside-down? Lets just say my original plan for hanging them didn't work and I had to flip them over. If it drives me crazy I will turn them so the words face the wall.  

A few hot glues clothes pins for important notes, pictures and a little love note:) and the area was complete. 

Up on the roof top

Before
I have been putting off painting the last section of the trim on out roof for about 3 years. I finally just got out there and did it yesterday. The weather was beautiful and it was actually relaxing and quiet. Best part is, it's done.
The view!
After